Okta OIDC SSO is a paid feature. If you’re using Infisical Cloud, then it is
available under the Pro Tier. If you’re self-hosting Infisical, then you
should contact sales@infisical.com to purchase a self-hosted license to use
it.
Create an OIDC application in Okta
In the Okta Admin Portal, select Applications > Applications from the navigation. On the Applications screen, click the Create App Integration button.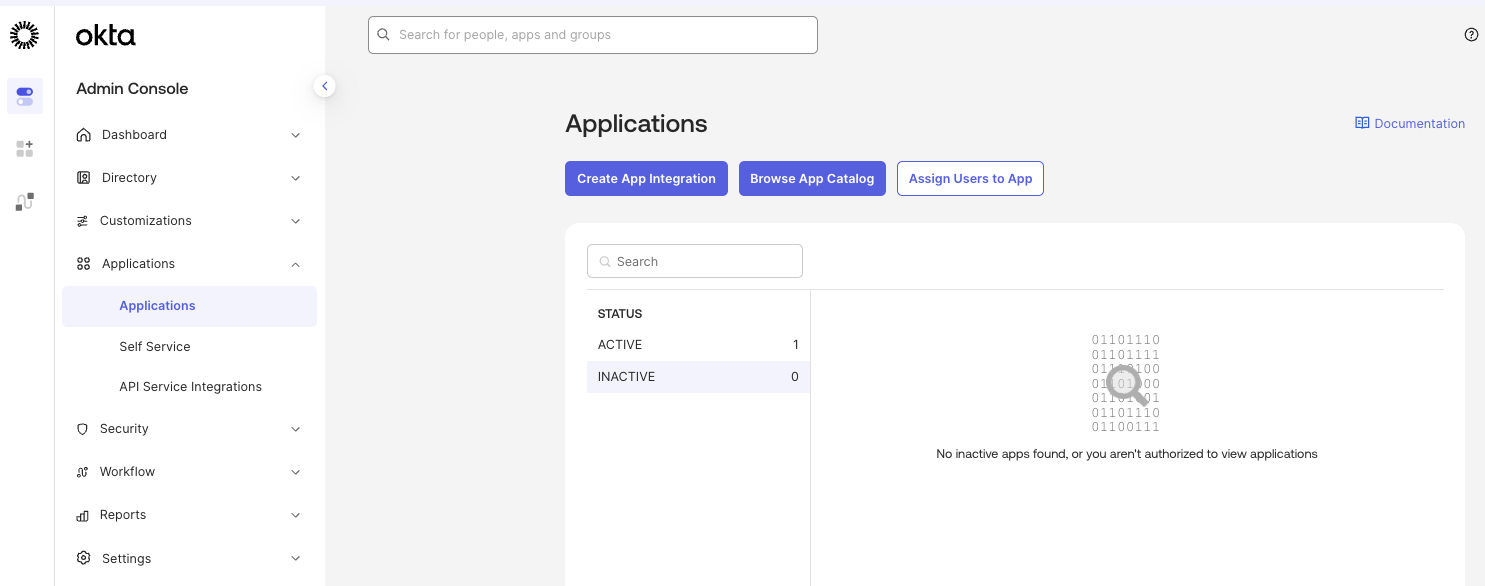 In the Create a New Application Integration dialog, select OIDC - OpenID Connect as the Sign-in method and Web Application as the Application type, then click Next.
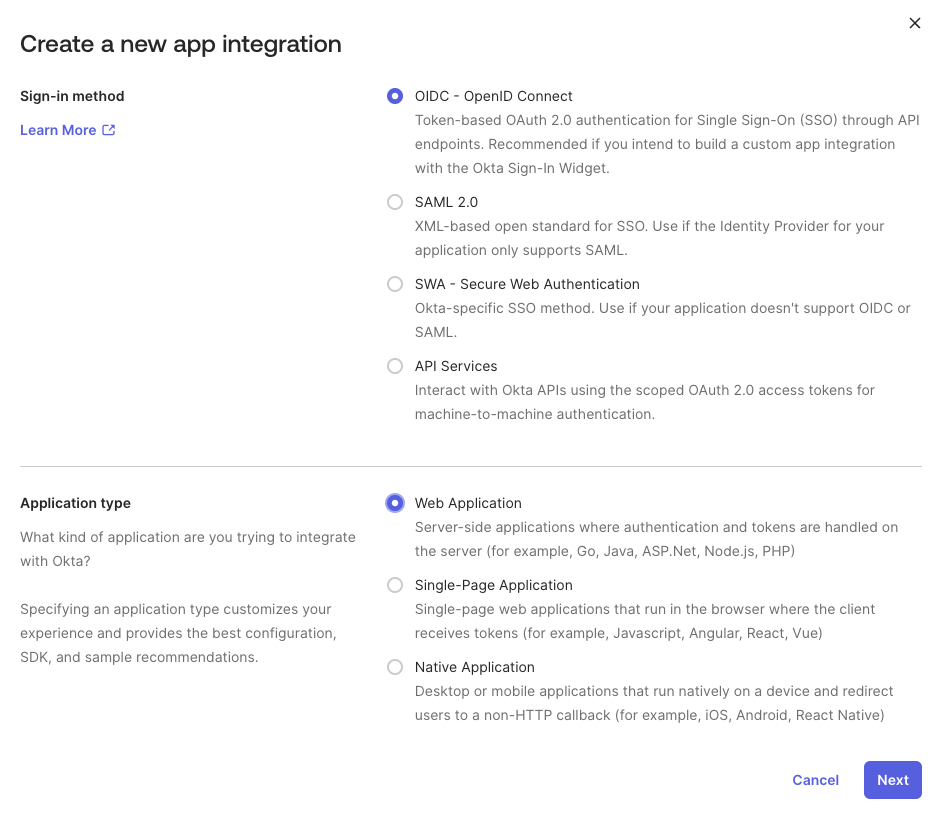 On the New Web App Integration screen, configure the following settings:Click Save to create the application.After saving, scroll down to the General Settings section and click Edit. Ensure the Proof of possession setting labeled “Require Demonstrating Proof of Possession (DPoP) header in token requests” is unchecked.
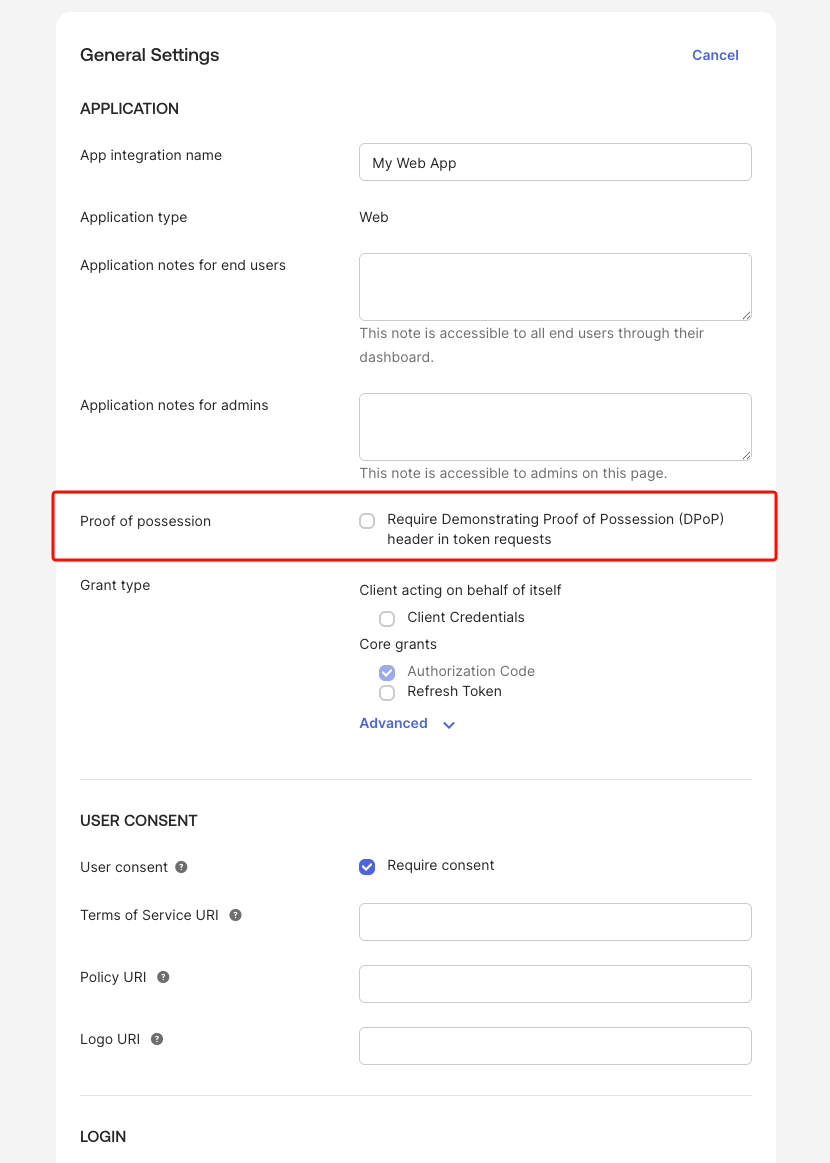
In the Create a New Application Integration dialog, select OIDC - OpenID Connect as the Sign-in method and Web Application as the Application type, then click Next.On the New Web App Integration screen, configure the following settings:-
App integration name: Enter a name like
Infisical - Grant type: Ensure Authorization Code is checked
-
Sign-in redirect URIs: Set to
https://app.infisical.com/api/v1/sso/oidc/callback -
Sign-out redirect URIs: (Optional) Set to
https://app.infisical.com -
Controlled access: Select the appropriate access level for your organization
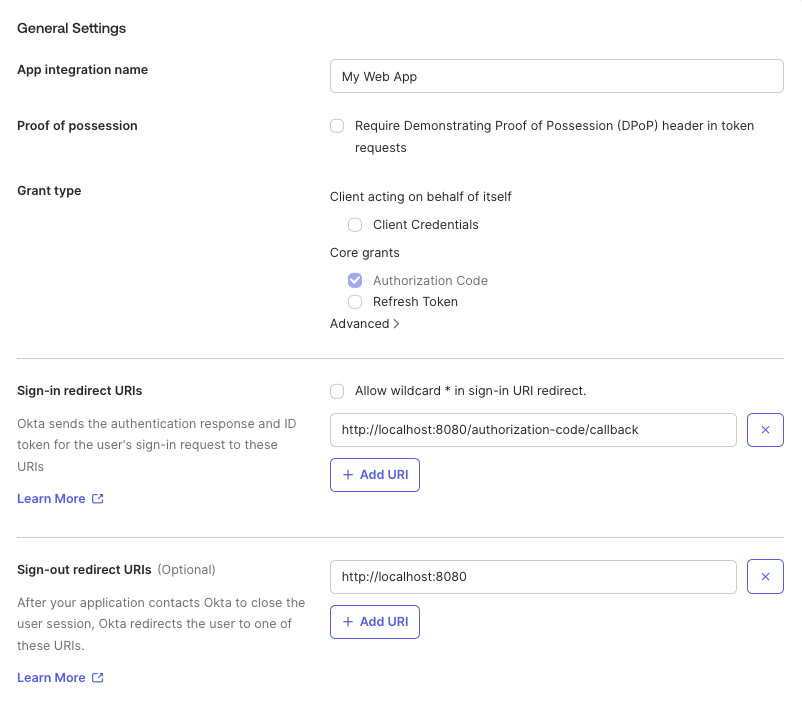
If you’re self-hosting Infisical, replace
https://app.infisical.com with your own domain in the redirect URIs.Retrieve Identity Provider (IdP) Information from Okta
After creating the application, you will be taken to the application’s settings page. From the General tab, copy the Client ID and Client Secret values.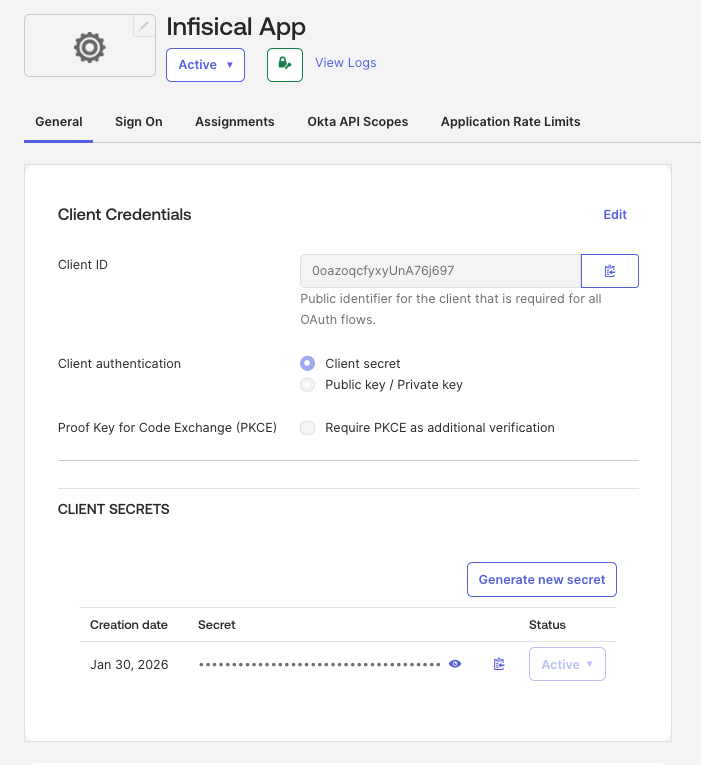 Next, you need to obtain the Discovery Document URL (also known as the OpenID Configuration URL). This URL follows the format:
  Your Discovery Document URL will be:
Next, you need to obtain the Discovery Document URL (also known as the OpenID Configuration URL). This URL follows the format: https://<your-okta-domain>/.well-known/openid-configuration.To find your Okta domain, look at the URL in your browser’s address bar while in the Okta Admin Portal. It typically looks like https://your-company.okta.com or https://your-company.oktapreview.com.Your Discovery Document URL will be: https://<your-okta-domain>/.well-known/openid-configurationFor example: https://your-company.okta.com/.well-known/openid-configurationFinish configuring OIDC in Infisical
Back in Infisical, on the OIDC configuration page, set the Configuration Type to Discovery URL.Fill in the following fields:
Fill in the following fields:Optionally, you can define a whitelist of allowed email domains to restrict which users can authenticate.Once you’ve filled in all the required fields, click Update to save the configuration.
-
Discovery Document URL: Enter the OpenID Configuration URL from step 2 (e.g.,
https://your-company.okta.com/.well-known/openid-configuration) - Client ID: Enter the Client ID from step 2
- Client Secret: Enter the Client Secret from step 2
-
JWT Signature Algorithm: Select RS256 (this is the default algorithm used by Okta)
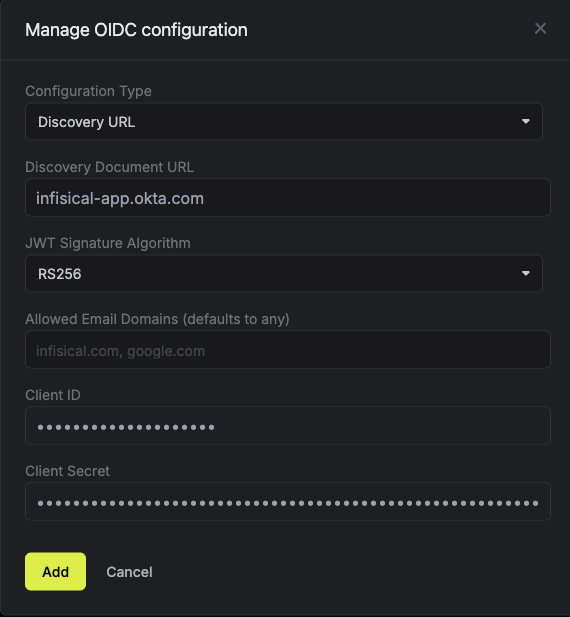
Currently, the following JWT signature algorithms are supported: RS256, RS512, HS256, and EdDSA. Okta typically uses RS256.
Assign users in Okta to the application
Back in Okta, navigate to the Assignments tab of your Infisical application and click Assign. You can assign access to the application on a user-by-user basis using the Assign to People option, or in bulk using the Assign to Groups option.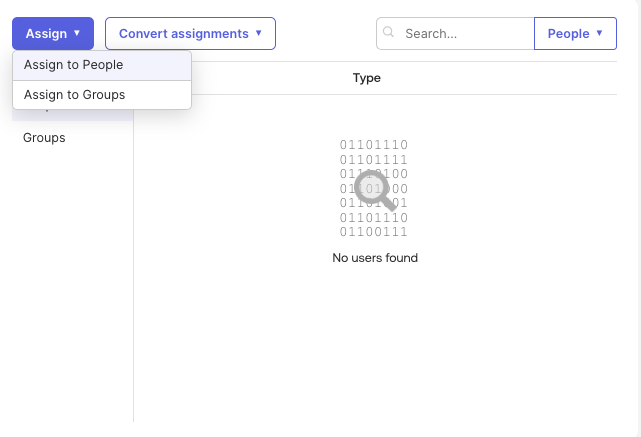 At this point, you have configured everything you need within the context of the Okta Admin Portal.
At this point, you have configured everything you need within the context of the Okta Admin Portal.Enable OIDC SSO in Infisical
Enabling OIDC SSO allows members in your organization to log into Infisical via Okta.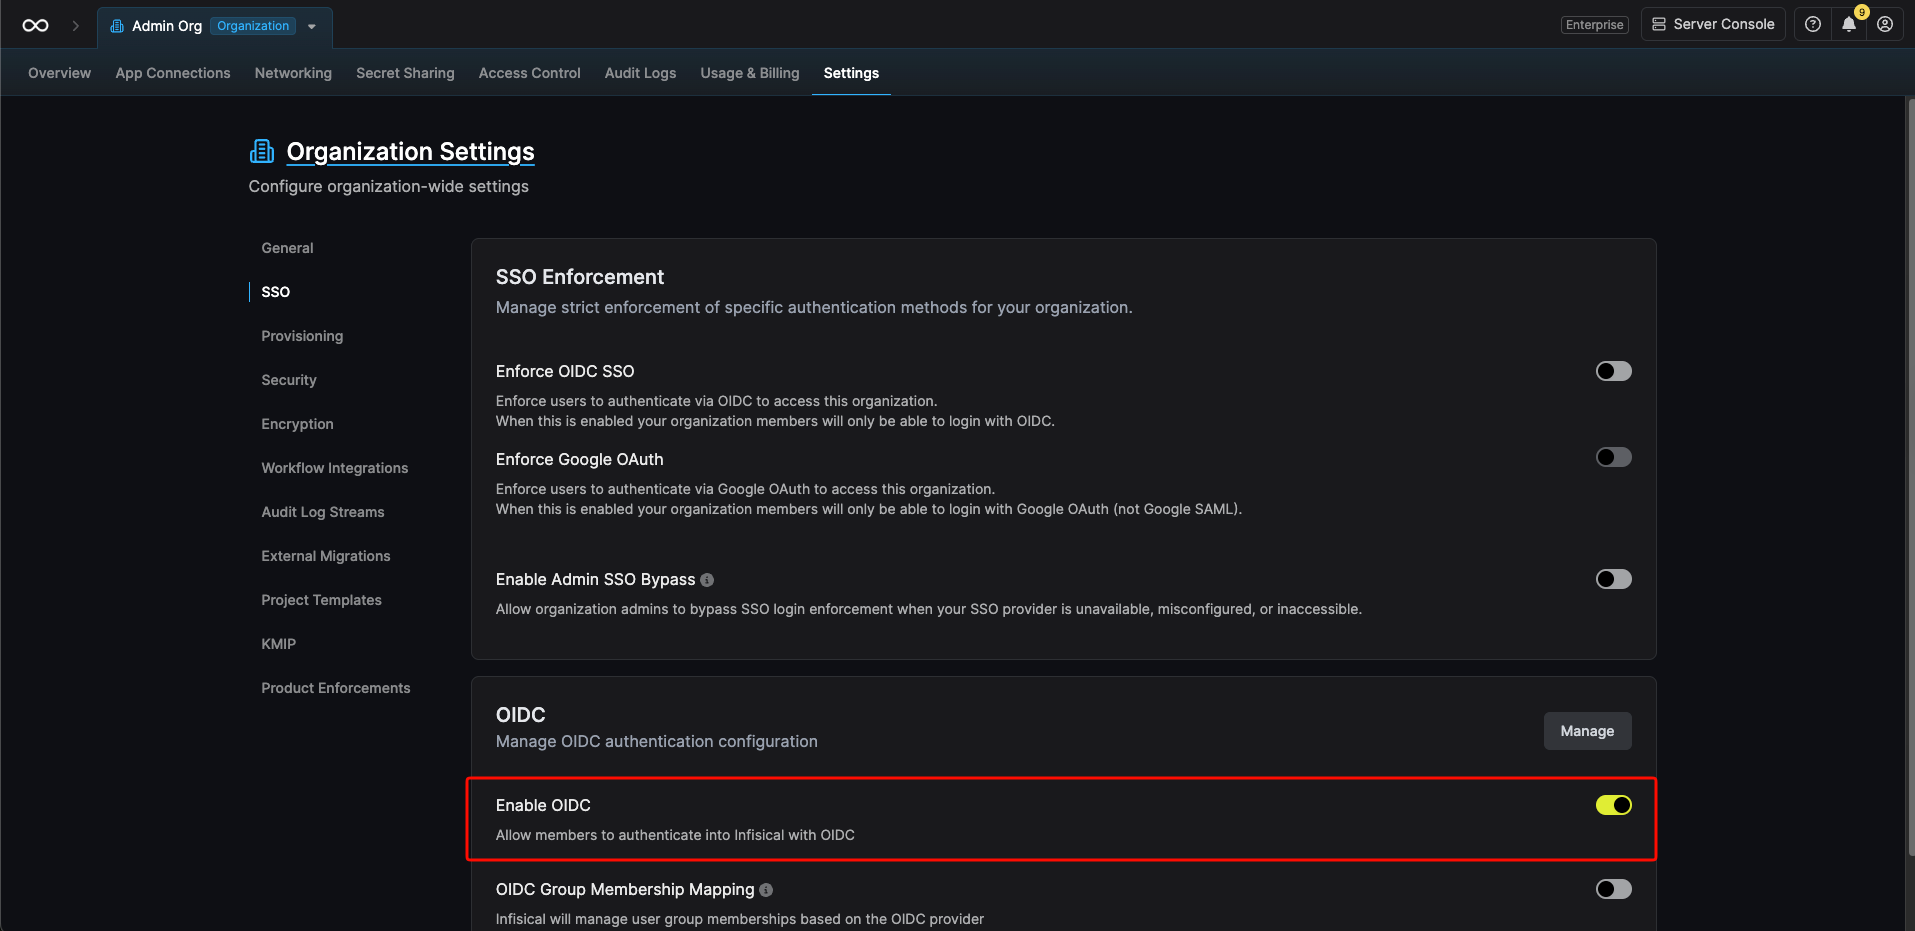
Enforce OIDC SSO in Infisical
Enforcing OIDC SSO ensures that members in your organization can only access Infisical
by logging into the organization via Okta.To enforce OIDC SSO, you’re required to test out the OpenID connection by successfully authenticating at least one Okta user with Infisical.
Once you’ve completed this requirement, you can toggle the Enforce OIDC SSO button to enforce OIDC SSO.
In case of a lockout, an organization admin can use the Admin Login Portal in the
/login/admin path e.g. https://app.infisical.com/login/admin.If you’re configuring OIDC SSO on a self-hosted instance of Infisical, make
sure to set the
AUTH_SECRET and SITE_URL environment variable for it to
work:AUTH_SECRET: A secret key used for signing and verifying JWT. This can be a random 32-byte base64 string generated withopenssl rand -base64 32.
SITE_URL: The absolute URL of your self-hosted instance of Infisical including the protocol (e.g. https://app.infisical.com)